This post explains how to setup a SQL Azure database.
Being a complete newbie to Microsoft Azure, I wanted to see how long I will be busy to get my application to work with the new Azure Database.
First things first, let’s press the “+ New” button and search select "Data + Storage". Then select "SQL Database". From there, select "SQL Database".
The easiest part is the Name. Simply provide the Database name you would like.
Now select the Server. If you haven’t created a server yet or you want an additional server, hit on “Create a new server”.
Be careful with the server admin login and password. You will need it a lot afterwards.

Select a blank data source and choose the Pricing Tier which suits your needs. When all done, press create:

Creating the SQL database will take a few minutes.
Techi Info
When creating a new Database in SQL Azure the mighty Wizard asks for a “Server”. So what happens when you choose“New SQL Database Server”?
First of all, a new SQL Server is created. Yes, you get your own Logical DB server and you don’t have any hardware maintenance. After the SQL Server has been created the database is created on your server.
What is the best SQL server in the world when you do not know how to connect to it?
At this point I want to point out the great job Microsoft did with Azure SQL. I use the same tool I’m using when working with my local SQL: SQL Server Management Studio (SSMS). no additional tools/updates required
To connect to any database, you need a SQL connection string. To get yours go to “All Resources” and select the Database you just created.
 A new window will open to your right. In this window, copy the “Server Name”
 Having the SQL connection string copied, open SSMS (SQL Server Management Studio). In SSMS, paste the SQL Connection String into the server name followed by “,1433” and choose “SQL Server Authentication”. Interesting fact is that you can simply add the port to the connection string.

Login and password are those provided during the creation process. Do not forget to add the Port ",1433" to the server name.
Now press “Connect” and BANG a wild error message appears:

Cannot open server 'mynewdemodbserver' requested by the login. Client with IP address 'xxx.xx.xx.xx.xx.’ is not allowed to access the server. To enable access, use the Windows Azure Management Portal or run spsetfirewall_rule on the master database to create a firewall rule for this IP address or address range. It may take up to five minutes for this change to take effect. (Microsoft SQL Server, Error: 40615)
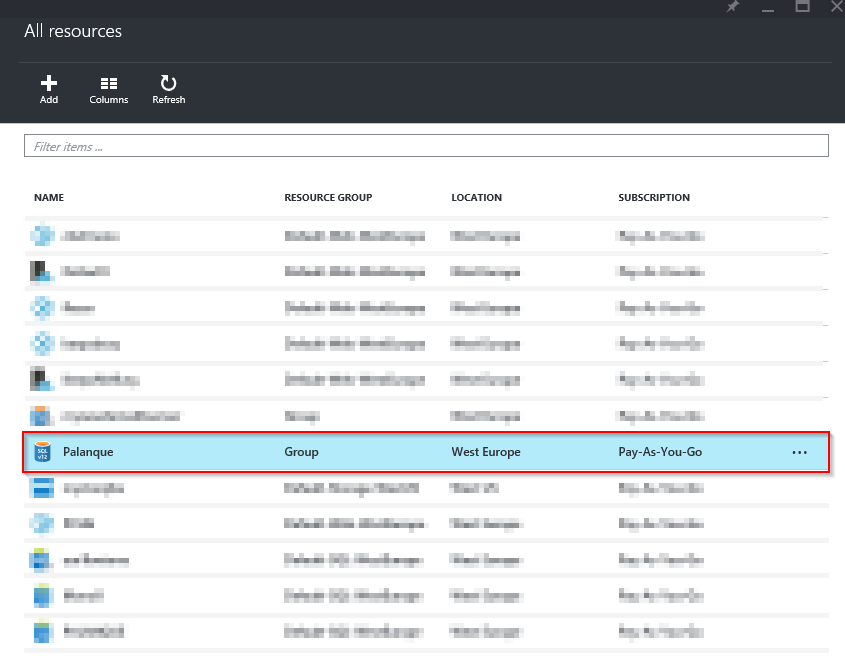
To fix this, go back the Azure Portal and select “All Resources”. In the list, select the SERVER you created in the previous point. The server is marked with a little gearwheel in the database icon:
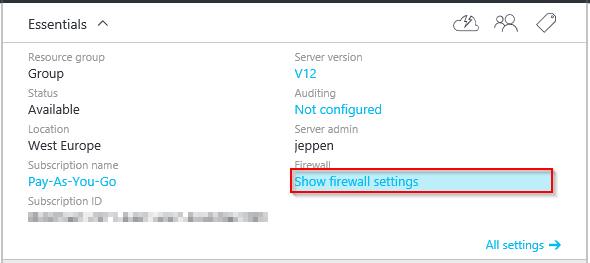
 In the opening window to the right, press on “Show firewall settings”:
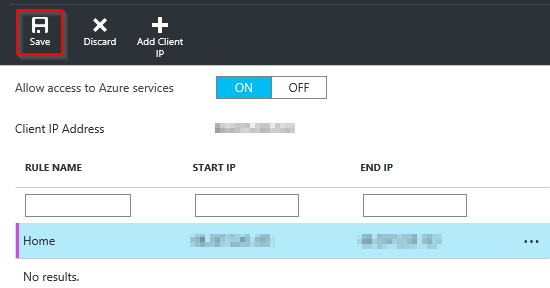
 A new window will again open to your right. On the Action Pane, press on the “Add Client IP” button:
 If you have a dynamic IP address (which is mostly always the case for home users), change the “Rule Name” to “Home”. This will help you identify the IP address to delete as soon as your IP address has changed. Now press Save:
Techi Info
The “Allow access to Azure services” allows other applications hosted in Azure to connect to the database server.
Now return to SSMS and press Connect. Your result should be similar to this one:

This kept me busy for: 15 minutes